
Complete Guide to Installing and Configuring Microsoft SQL Server Express with SSMS

Jayson Peralta
Software Developer & Tech EnthusiastComplete Guide to Installing and Configuring Microsoft SQL Server Express with SSMS
Introduction
Configuring Microsoft SQL Server Express correctly makes local development and small production deployments reliable and secure. This guide walks through downloading and installing SQL Server Express, enabling network connectivity, connecting with SQL Server Management Studio (SSMS), creating databases, setting up logins and permissions, and troubleshooting common authentication issues. Screenshots are referenced where helpful — replace or remove them as needed for your publication.
Prerequisites
- Windows machine with administrative rights
- Internet access for downloads
- ~2 GB free disk space and 4+ GB RAM recommended for smooth operation
- Optional: familiarity with Windows services and basic networking
Part 1 — Installing SQL Server Express
Why choose SQL Server Express?
SQL Server Express is a free, lightweight edition suitable for development, testing, and small production workloads. It includes core database engine features and integrates with SSMS for management.
Step 1 — Download
Go to the official Microsoft downloads page and pick the Express edition: https://www.microsoft.com/en-us/sql-server/sql-server-downloads
Choose the appropriate installer (EXE for a quick install; ISO if you need offline media).
(Insert screenshot: installation download page)
Step 2 — Run the installer
Run the downloaded installer and follow the wizard. Recommended choices for most development setups:
- Select the "Express" edition
- Use default installation paths unless corporate policy requires otherwise
- After engine install, install SQL Server Management Studio (SSMS) if prompted
(Insert screenshot: Express installation options)
Part 2 — Enable TCP/IP for Network Connectivity
The default behavior
SQL Server Express typically listens only on shared memory for local connections. To accept remote or network connections, enable TCP/IP.
(Insert screenshot: TCP/IP disabled warning)

Step 3 — Enable TCP/IP
Open SQL Server Configuration Manager:
- Navigate to SQL Server Network Configuration → Protocols for
your instance - Right-click
TCP/IPand choose Enable
Step 4 — Configure TCP/IP port
- Right-click
TCP/IP→ Properties - Select the IP Addresses tab
- For each relevant IP (e.g.,
IPAll), configure:TCP Dynamic Ports: leave blank (not zero)TCP Port:1433(or a chosen static port)
- Apply and restart the SQL Server service
Important:
- Leave
TCP Dynamic Portsblank; a zero value means dynamic allocation and can cause connection inconsistencies. - Restart the SQL Server service after changes for them to take effect.
Part 3 — Firewall and Network Considerations
If you enable TCP/IP and expect external connections:
- Open the configured SQL port (default
1433) in Windows Firewall or your network firewall. - If using a non-standard port, update firewall rules accordingly.
- Consider restricting inbound rules to trusted IPs or VPN ranges for production security.
Example Windows Firewall command (run as admin):
New-NetFirewallRule -DisplayName "SQL Server (TCP 1433)" -Direction Inbound -Protocol TCP -LocalPort 1433 -Action Allow
Part 4 — Connecting with SSMS
Finding your server name
For a local Express install, the typical instance name is:
COMPUTERNAME\\SQLEXPRESS
Example:
DESKTOP-EXAMPLE\\SQLEXPRESS
Connecting steps in SSMS
- Open SSMS
- Enter the server name (
COMPUTERNAME\\SQLEXPRESS) - Select authentication:
Windows Authentication(default, uses your Windows credentials)SQL Server Authentication(username/password; requires mixed mode)
- Click Connect

Part 5 — Create a Database
Step 5 — New database
In SSMS:
- Right-click Databases → New Database
- Give it a name and leave defaults unless you need custom file locations or collations
- Click OK
You should now see the database listed under Databases in Object Explorer.
Part 6 — Create Logins and Assign Permissions
Why create dedicated logins?
Avoid using sa or your personal Windows account for application access. Create least-privilege SQL logins for apps and users.
Step 6 — Create a login
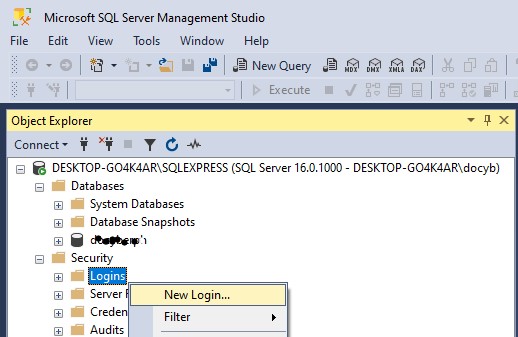
- In Object Explorer, expand the server → Security → Logins
- Right-click Logins → New Login
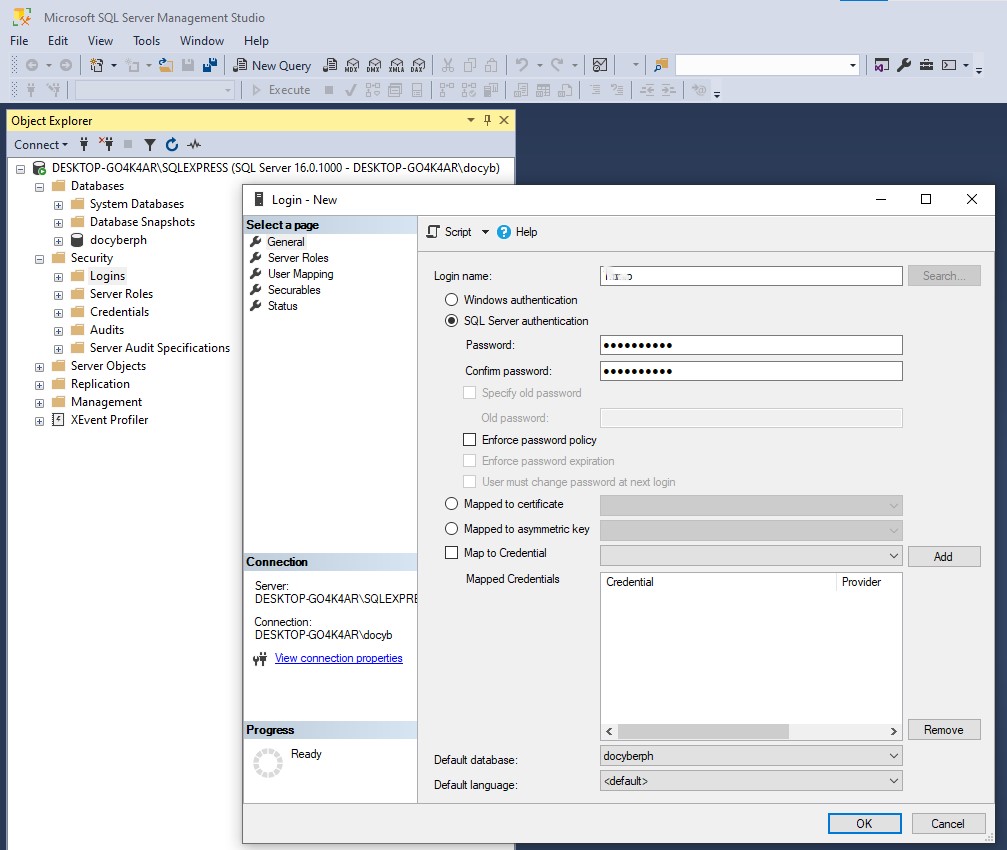
- Configure:
- Login name (e.g.,
app_user) - Authentication: choose
SQL Server Authenticationif not using Windows auth - Enter and confirm a secure password
- Optionally: enforce password policies or require password change at next login
- Login name (e.g.,
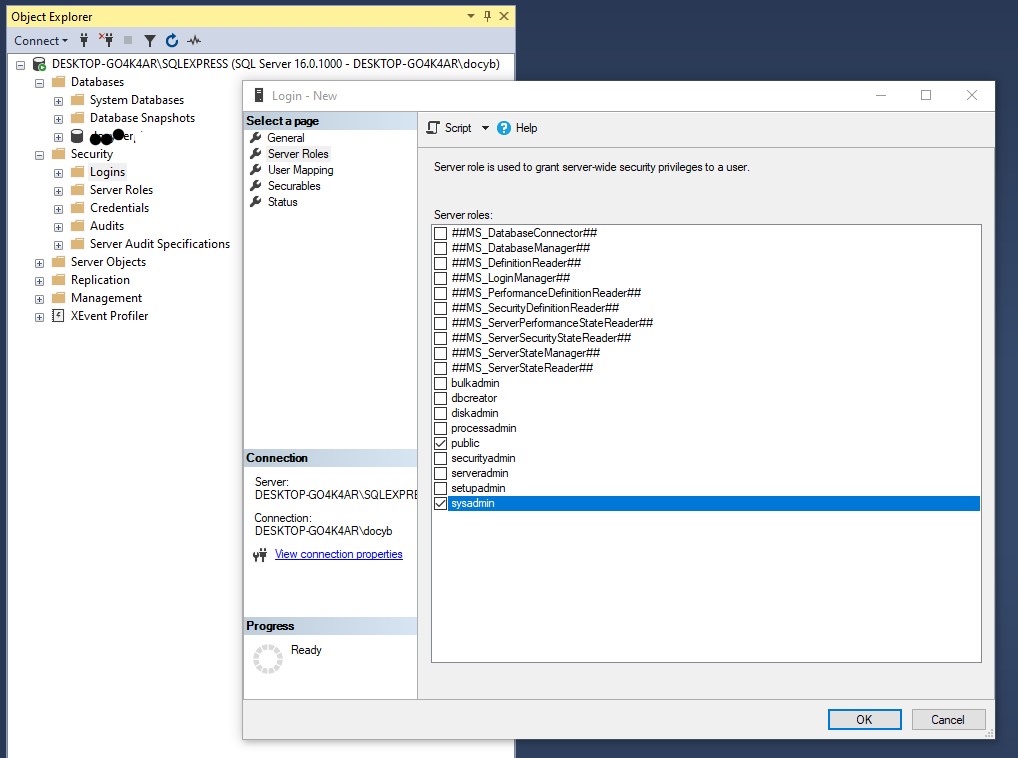
- On Server Roles, assign only the roles needed (avoid
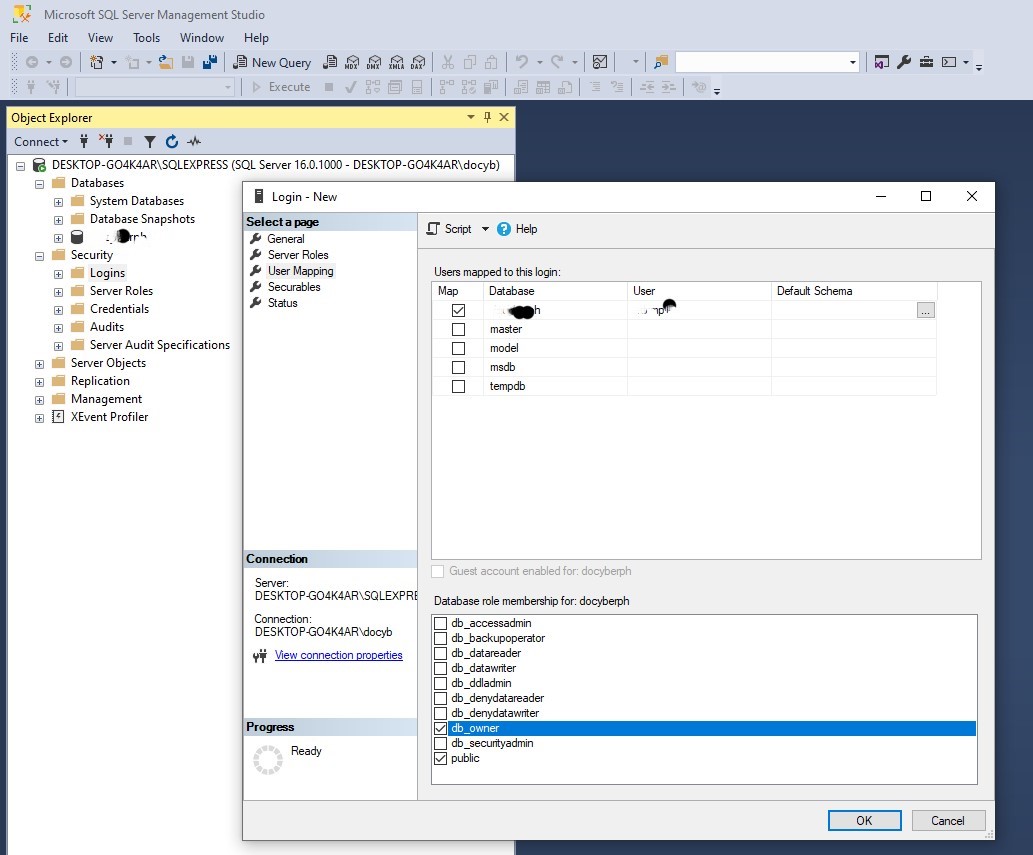
sysadminunless required) - On User Mapping, map the login to your database and grant appropriate DB roles:
db_ownerfor full control (development only)db_datareader/db_datawriterfor typical app access
Click OK to create the login.
Part 7 — Enable Mixed Authentication (SQL & Windows)
Problem: SQL logins fail by default
If you cannot log in with SQL credentials, the server may be configured for Windows Authentication only.
Step 8 — Change server authentication mode
- In SSMS, right-click the server → Properties
- Go to Security
- Select SQL Server and Windows Authentication mode
- Click OK; then restart the SQL Server service (right-click server → Restart) for the change to take effect


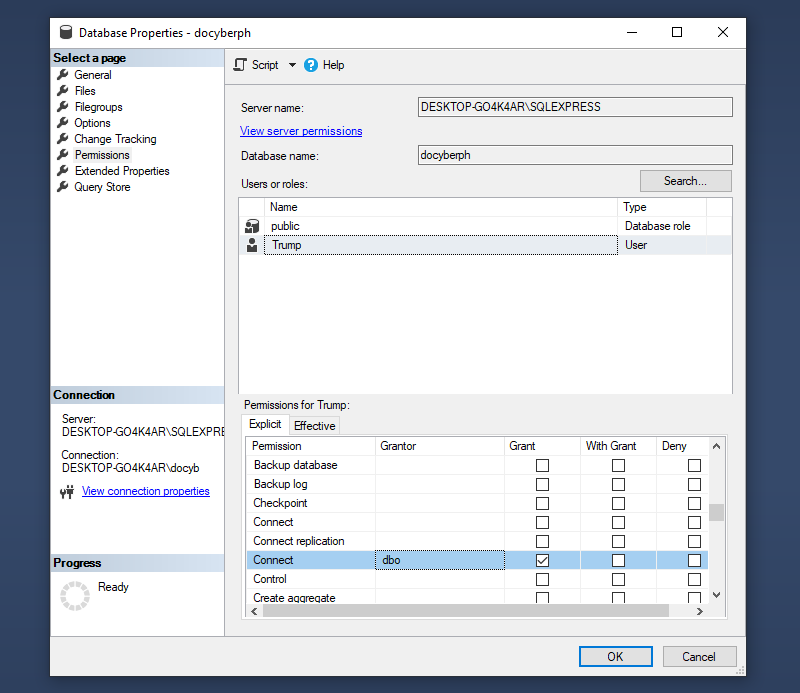
!database properties 1 dialog !database properties 2 dialog
Note: Changing auth mode does not create SQL logins — you must create them separately (see Part 6).
Part 8 — Verification & Common Troubleshooting
- If remote connections fail:
- Confirm
TCP/IPis enabled in SQL Server Configuration Manager - Confirm port is set and service restarted
- Verify firewall rules and network routing
- Use
telnet <server-ip> 1433orTest-NetConnection -ComputerName <host> -Port 1433to confirm reachability
- Confirm
- If SQL logins fail:
- Ensure server is in mixed mode
- Check that the login is not disabled and password is correct
- Review SQL Server error log for authentication failures
- If connection strings fail in applications:
- Ensure instance name and port are correct; a connection string example:
Server=DESKTOP-EXAMPLE\\\\SQLEXPRESS,1433;Database=MyDb;User Id=app_user;Password=YourPassword;
- Ensure instance name and port are correct; a connection string example:
Part 9 — Maintenance & Next Steps
- Configure regular database backups and test restores
- Set up basic monitoring and alerting (SQL Server error logs, perf counters)
- Harden security: disable
saor rename it, enforce strong passwords, restrict network access - For production, consider using a full SQL Server edition or cloud-managed SQL for scalability and HA
Resources
- Microsoft: Change server authentication mode — https://learn.microsoft.com/en-us/sql/database-engine/configure-windows/change-server-authentication-mode
- SQL Server Configuration Manager overview — https://learn.microsoft.com/
- Troubleshooting connections (Stack Overflow thread) — https://stackoverflow.com/questions/25577248/node-js-mssql-tedius-connectionerror-failed-to-connect-to-localhost1433-conn
Conclusion
Following these steps gives you a secure, network-ready SQL Server Express installation with a manageable login and database setup. Key takeaways:
- Enable and configure TCP/IP for network access
- Use static port configuration (leave dynamic ports blank)
- Create dedicated logins with least privilege
- Enable mixed authentication only if you need SQL logins
- Open and protect firewall rules as appropriate
If you'd like, I can:
- Add or replace screenshot placeholders with local image files
- Produce a short checklist or printable quick-reference card
Which of those would you like next?